PiccoloAnimatore v3 ( terza edizione ), permette di creare animazioni utilizzando degli sprites ( immagini ), esportabili poi sia come immagini.png o come codice da inglobare in GameMaker 1.4 e 2.
PiccoloAnimatore v3 è un progetto amatoriale ( non professionale ), realizzato da una sola persona ( civic71 ) e per ciò non si assicurano la mancanza di bug 😅 .
Il programma è un eseguibile "Single Runtime Exe" autonomo ( Stand Alone ) e non richiede l'istallazione sul pc.
Ogni qualvolta che lo avviate, verrà ricercata online l'esistenza o meno di una nuova versione e nel caso affermativo verrete subito informarti nella Home.
Iniziare
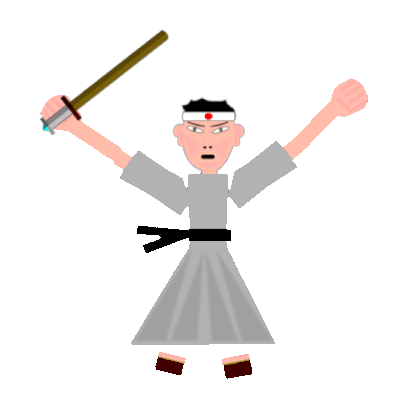
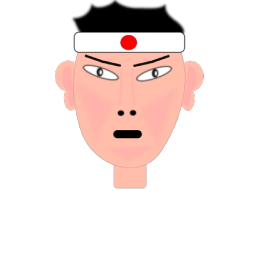
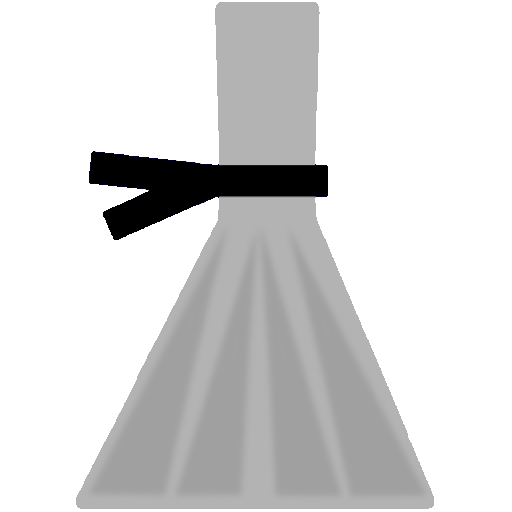
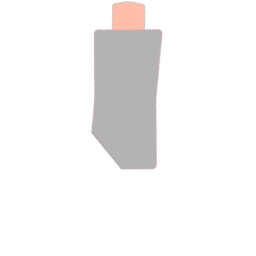
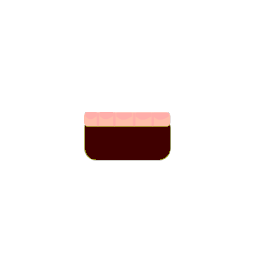
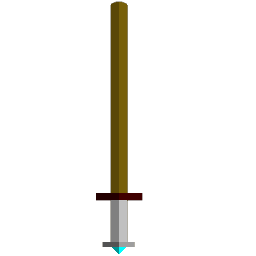
Creiamo un personaggio utilizzando programmi come Inkscape , ecco un esempio :
Ora esportiamo ogni sua parte ( testa, corpo, braccio, avambraccio, piede e spada ) nel formato PNG avente un unico colore di trasparnza con misure
consigliate in pixel, di un multiplo di 2 : 16x32; 32x32; 64x64, 128x128, 64x256, ecc... ;
Quindi avviamo PiccoloAnimatore v3 e creaiamo un nuovo progetto dove importare questi nostri sprites.
PROJECT
Quando si avvia PiccoloAnimatore v3, si accede a questa schermata dei progetti.
Per creare un nuovo progetto ( massimo 75 ):
cliccate il bottone con il tasto sinistro del mouse or.
Si aprirà così il dialogo dove inserire il nome ( massimo 8 caratteri ) del nuovo progetto .
Confermiamo premendo .
Verrà così creato il relativo bottone.
Per importare un progetto nel formato zip :
cliccate il bottone con il tasto sinistro del mouse or.
Selezionate il file.zip del progetto che volete caricare
Attenzione : non deve già esistere un progetto con il medesimo nome;
Attenzione : il nome non deve avere un numero maggiore di 8 lettere .
Verrà così importato e creato il relativo bottone.
Attenzione : se una volta caricato quel progetto risulta vuoto, è probabile che il suo nome sia errato !
Ti basterà aprire la cartella dei progetti quindi il file dati.txt e modificare il nome con quello esatto.
Puoi scaricare alcuni miei progetti gratuiti da qui 👉 👉 👉 👉 👉
Per aprire la cartella dei progetti ( utile per fare un backup di un progetto, zippando la relativa cartella ) :
cliccate il bottone con il tasto sinistro del mouse or.
Selezionate e cliccate con il tasto destro del mouse, la cartella del progetto della quale volete farne un backup.
Dal Menù a tendina selezionate "invia a ... cartella compressa" per creare un file zip.
Attenzione : quando zippate un progetto non modificatene il nome;
Quindi spostate il file.zip dove lo ritenete più opportuno.
Per impostare una lingua ( Inglese o
Italiano) :
cliccate il bottone della relativa bandiera con il tasto sinistro del mouse or.
Tastiera
visualizza o meno le informazioni di un bottone selezionato;
chiudi il programma o ritorna nella Home.
metti il programma in fullscreen ( a pieno schermo ).
In alcune circostanze il fullscreen mode si disabiliterrà in automatico .
passa alla sezione successiva ( bottoni della Barra in alto ).
seleziona sequenzalmente i bottoni presenti nella schermata.
seleziona il bottone precedente.
Quando un bottone è selezionato :
diviene con lo sfondo di colore verde :
si possono utilizzare i pulsanti della tastiera ad esso assocciati
( di solito )
per attivare la sua funzione;
vengono raffigurati i pulsanti della tastiera ad esso assocciati.
I bottoni posso avere più funzioni, attivabili in base al tasto del mouse con il quale vengono cliccati o premendo i pulsanti della tastiera ad esso assocciati.
LOADING PROJECT
Per caricare un progetto :
cliccate il bottone del relativo progetto con il tasto sinistro del mouse, or.
A quel punto si aprirà il relativo dialogo avente questi bottoni cliccabili or :
caricare il progetto ;
copiare il progetto con un nome diverso ;
cancellare il progetto ;
chiudere il dialogo ;
Barra in alto
Quando si carica un progetto, si può notare, nella barra in alto, 8 bottoni per altrettante sezioni di PiccoloAnimatore v3 :
SPRITES : caricare gli sprites ( immagini );
SKELETON : creare lo scheletro;
TEXTURE : assegna alle ossa lo sprite desiderato;
SEQUNCE : creare una nuova animazione ;
ANIMATION : creare l' animazione;
EXPORT : esportare l' animazione per GameMaker;
FOTO : screenshot dell' animazione nel formato .png;
MENU : per ritornare al menù principale;
E' possibile premere per spostarsi da una sezione a quella successiva.
SPRITES
Accediamo quindi alla sezione SPRITES, dove andremo a caricare le nostre immagini.PNG.
Qui troveremo 18 caselle che riportano il nome dello sprite caricato e le sue origini.
Selezioniamo una casella UPLOAD SPRITE, con il mouse
( oppure premete e ),
quindi clicchiamola or per aprire il suo dialogo.
Si aprirà così il dialogo dello sprite dove potremmo :
caricare un'immagine o strip ( ovvero composta da più frame concatenati ) .png :
Si consigliano sprite o frame con un unico colore di trasparenza e con misure di un multiplo di 2 : 64x64px, 128x128px, 64x256px, ecc... ;
Origin X :
cliccate con il tasto sinistro del mouse e trascinate la barra
oppure premete o ,
per modificare l'origine x dello sprite ( punto di rotazione dello sprite da non confondere con quello dell' osso )
con un range da -720 ad un massimo di 720.
Origin Y :
cliccate con il tasto sinistro del mouse e trascinate la barra
oppure premete o ,
per modificare l'origine y dello sprite ( punto di rotazione dello sprite da non confondere con quello dell' osso )
con un range da -720 ad un massimo di 720.
impostare il numero dei frame presenti in una immagine strip;
Per esempio questo sprite_strip ( di larghezza 240px ed altezza 80px ) è composto da 3 frame, ma si imposterà 2 come valore perchè lo si calcola
partendo dallo 0 :
assegnare un nome ( non obbligatorio ).
salvare le modifiche dello sprite;
( dalla versione 3.24.03.24) :
esso permette di settare il caricamento degli sprite con le loro trasparenze oppure senza ( nel caso .png opache ).
In quest'ultimo caso verrà comunque reso trasparente il background dello sprite;
Cliccatelo con il bottone sinistro del mouse ;
oppure premete ;
cancellare lo sprite;
chiudere il dialogo ;
SKELETON
Dopo aver importato tutti gli sprites neccessari, passiamo alla sezione SKELETON, dove creeremo lo scheletro.
Al principio esiste già un 1° osso verde a forma di rombo, il quale è denominato Root.
Esso sarà il padre di tutte le ossa presenti nello scheletro .
Le ossa create sucessivamente sono definite figli del osso padre che le ha generate.
Nella precedente versione di PiccoloAnimatore vi era il limite di creare 5 ossa per padre.
Questa nuova versione non ha limiti di figli per ogni padre, ma si tenga in considerazione che troppe ossa potrebbero diminuire gli FPS in un gioco.
Tutte le ossa tranne il Root possono essere allungate, ruotate, spostate, nominate, aggiunte e cancellate :
Per modificare un osso, questo dovrà essere prima selezionato, divenendo così di colore verde.
premete per selezionare il padre dell' osso verde;
cliccate il bottone con il tasto sinistro o destro del mouse.
cliccate il bottone con il tasto centrale del mouse or, per visualizzare il :
dialogo con i bottoni di selezione delle ossa
Il primo ( di colore blu di nome "Father" ) è il padre dell' osso selezionato.
Gli altri riportano il nome dell' osso e la sua depth.
Cliccatene uno per selezionare quel osso e chiudere il dialogo.
Utilizzate la rottellina del mouse per spostarli in alto o in basso ;
per ruotare un osso verde :
cliccate il bottone con il tasto sinistro o destro del mouse.
oppure premete o .
Tenendo premuto anche non ruoteranno i suoi figli.
Tenendo premuto anche ruoteranno solo i suoi figli.
Tenendo premuto anche la rotazione avverrà lentamente.
e per spostare un osso verde :
Tali funzioni utilizzano la fisica e trascineranno anche le altre ossa dello scheletro e ciò potrebbe comportare un risultato non soddisfacente !!,
utilizzateli con cautela.
cliccate i bottoni con il tasto sinistro o destro del mouse,
oppure premete , ,
o .
per allungare un osso verde :
cliccate il bottone con il tasto sinistro o destro del mouse,
oppure premete , .
E' molto utile rinominare un osso, con ciò che esso andrà a rappresentare : testa, braccio destro, braccio sinistro, ecc...
Per rinominare un osso verde aprite il dialogo del nome :
cliccate il bottone con il tasto sinistro del mouse, oppure premete .
Quando si salva, viene prima controllato che ogni ossa abbia un nome differente dall' altro e nel caso si trovino 2 ossa aventi il medesimo nome,
non si potrà salvare. Quindi prima di salvare, controllate che non vi siano 2 ossa con il medesimo nome.
cancella o aggiungi un osso
( attenzione : non è possibile aggiungere o cancellare un osso se si ha già creato una Sequenza!! )
ADD ( aggiungi un nuovo osso ad un osso verde [ add un figlio al padre ] )
cliccate il bottone con il tasto sinistro del mouse, oppure premete .
DELETE ( per cancellare un osso verde )
cliccate il bottone con il tasto destro del mouse, oppure premete .
Scheletri preferiti :
:
E' possibile salvare 3 scheletri come preferiti, per poterli riutilizzare in nuovi progetti.
Qualora uno scheletro abbia già delle ossa, basterà premere Q + 1 o 2 o 3 per salvarlo come preferito.
Mentre qualora non esista alcun osso se non il Root, apparirà un pop-up che vi farà visualizzare 3 screenshot degli scheletri di ossa
precedentemente salvati.
Basterà quindi premere Q + 1 o 2 o 3 per caricare quel scheletro.
quando avrete completato il vostro scheletro ricordate di salvare .
Ogni qualvolta apportate delle modifiche questo bottone avrà lo sfondo rosso, per ricordarvi di salvare.
cliccando il bottone con il tasto sinistro del mouse, oppure premete ;
TEXTURE
1/3 in questa schermata troviamo un ulteriore bottone delle ossa, utile a visualizzare o meno le ossa,
oppure visualizzarle sopra o sotto al proprio sprite :
cliccate il bottone con il tasto sinistro del mouse, oppure premete .
Oltre ai bottoni delle ossa ( a sinistra ), avremo anche i bottoni delle texture (a destra).
Per assegnare uno sprite alle ossa desiderate :
selezioniamo un osso ( dieverrà di colore verde ).
attiviamo la visualizzazione dello sprite, per l' osso selezionato ( non tutte le ossa hanno bisogno di visualizzare uno sprite ).
settiamo il giusto sprite per ogni osso selezionato.
modifichiamo i vari parametri : indice, profondità, rotazione, grandezza, posizione, colore e salviamo.
per attivare la visualizzazione dello sprite :
cliccate il bottone con il tasto sinistro del mouse
per settare la profondità dello sprite ( posizionare uno sprite sopra o sotto ad un altro ) :
Il valore di depth è da 1 al numero totale di ossa presenti.
cliccate il bottone con il tasto sinistro o destro del mouse
oppure premete o .
Solo nella sezione TEXTURE :
cliccate il bottone con il tasto centrale del mouse
oppure premete per impostare la depth manualmente.
Quando si salva, viene prima controllato che ogni ossa abbia una depth differente dall' altro e nel caso si trovino 2 ossa aventi la
medesima depth, non si potrà salvare. Quindi prima di salvare, controllate che non vi siano 2 ossa con la medesima depth.
per ruotare lo sprite :
cliccate il bottone con il tasto sinistro o destro del mouse
Spuntando la casella , le modifiche apportate saranno applicate a tutte le ossa.
Il colore selezionato sarà raffigurato al centro .
Il bottone permettereà di resettare i colori .
Il bottone permettereà di chiudere il dialogo.
quando avrete completato il vostro scheletro ricordate di salvare .
Ogni qualvolta apportate delle modifiche questo bottone avrà lo sfondo rosso, per ricordarvi di salvare.
cliccate il bottone con il tasto sinistro del mouse, oppure premete .
SEQUENCE
Bene ora creiamo una sequence ( massimo 15 sequence ) :
Si aprirà così il dialogo della Sequenza dove troveremo questi bottoni :
per caricare la sequenza ed accedere ad ANIMATION .
per copiare questa sequenza con un nuovo nome.
per eliminare questa sequenza.
per chiudere il dialogo.
Mentre il bottone permetterà di unire 2 sequence, ma solo nel caso il numero totale dei loro FRAME non
superi 60 .
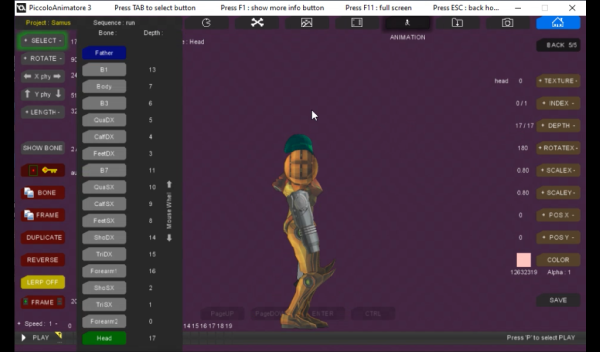
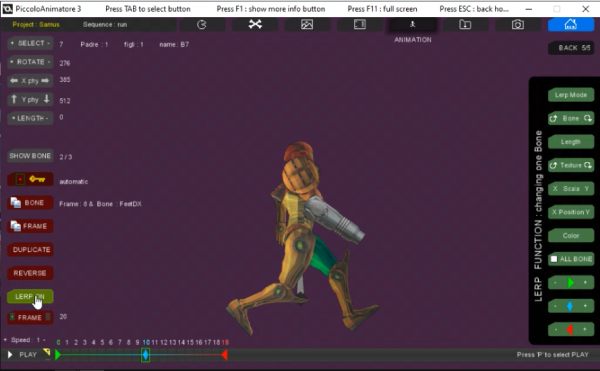
ANIMATION
Qui potremmo creare le animazioni modificando i parametri dello scheletro e dei relatvi sprites.
Per incominciare un animazione :
selezionate un frame
( rettangoli presenti nella barra in basso ) cliccandoci sopra
oppure premete o ,
( qualora il bottone
sia già selezionato e quindi con lo sfondo verde ).
Esso diverrà di colore verde :
Poi selezionate un osso ( diverrà verde ), quindi utilizzate i vari bottoni per ruotarlo o modificare il suo sprite.
Il frame modificato avrà ora un puntino rosso .
Ripetete ciò in ogni frame desiderato .
Alla fine salvate tutte le modifiche apportate.
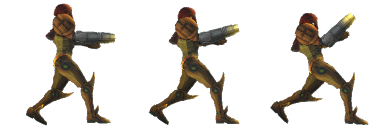
Nell' esempio qui sotto, andremo a modificare la gamba del personaggio apportando delle modifiche solo nei frames numero 0, 10 e 19 ed
utilizzando poi le funzioni LERP :
ALTRI BOTTONI
avanzare o arretrare l' animazione :
cliccate il bottone con il tasto sinistro o destro del mouse
oppure premete o .
Premendo anche le animazioni avanzeranno frame per frame.
Premendo andrete a selezionare direttamente questo bottone PLAY.
salvataggio automatico o manuale ( aggiunta puntini rossi ) :
cliccate la chiave con il tasto sinistro o destro del mouse, oppure premete Nel caso sia impostato in manuale, dovrete cliccare questo bottone con il tasto destro del mouse affinchè appaia
nel frame selezionato, il puntino rosso, che memorizza momentaneamente le modifiche apportate al frame.
copia e paste i dati di un osso di un frame in un altro frame :
selezionate un osso.
selezionate un frame.
cliccate il bottone con il tasto sinistro del mouse oppure premete .
selezionate un altro frame.
cliccate il bottone con il tasto destro del mouse oppure premete
copia e paste i dati di un frame in un altro frame :
selezionate un frame.
cliccate il bottone con il tasto sinistro del mouse oppure premete .
selezionate un altro frame.
cliccate il bottone con il tasto destro del mouse oppure premete
aggiungi l'animazione precedentemente salvata :
cliccate il bottone con il tasto sinistro del mouse oppure premete
capovolgi l'animazione precedentemente salvata :
cliccate il bottone con il tasto sinistro del mouse oppure premete
attiva la visualizzazione dei bottoni LERP :
cliccate il bottone con il tasto sinistro del mouse oppure premete
aumentare o diminuire i frame ( massimo 60 ) :
cliccate il bottone con il tasto sinistro o destro del mouse.
oppure premete o .
ritorna indietro ( massimo 5 posizioni ) :
quando si fanno degli errori si può rimediare tornando indietro tramite questo bottone .
Se però gli errori non si risolvono, è consigliato ritornare nella sezione SEQUENCE e ricaricare l' animazione.
cliccate con il tasto sinistro o destro del mouse
oppure premete .
FUNCTION LERP
Per facilitare e velocizzare l'animazione utilizzeremo le funzioni dei bottoni LERP, presenti sulla destra dello schermo :
E' sufficente :
salvare le modifiche di 2 o 3 frame
impostare i marcatori su tali frame
selezionare una funzione lerp desiderata, cliccando il relativo bottone con il tasto sinistro o destro del mouse
oppure qualora tale bottone è selezionato ( con lo sfondo verde ), premete i relativi tasti della tastiera;
Vediamo ogni singola funzione LERP :
permette di impostare la tipologia di lerp con 2 o 3 marcatori :
Se ci sono 2 marcatori ,
quella funzione sarà interpolata partendo dal frame avente il triangolo verde fino al frame che ha il triangolo rosso.
ESEMPIO :
considerando che il valore del frame con il marcatore verde = 100;
che il valore del frame con il marcatore rosso = 10;
che fra questi 2 frame vi sono altri 8 frame, per un totale di 10 frame
i frame riceveranno questi valori : 100,90,80,70,60,50,40,30,20,10;
Mentre se i marcatori sono 3,
l'interpolazione avverrà partendo dal frame avente il triangolo verde, fino al frame avente il rombo blu.
Poi continuerà dal frame avente il marcatore rombo blu al frame avente il marcatore con il triangolo rosso.
ESEMPIO :
considerando che il valore del 1° frame con il marcatore verde = 100;
che il valore dele l'ultimo frame con il marcatore rosso = 100;
che il valore del 6° frame con il marcatore blu = 10;
che in totale vi siano 11 frame;
i frame riceveranno questi valori : 100,80,60,40,20,10,20,40,60,80,100;
rotazione nel senso orario o antiorario dell' osso selezionato ed i suoi figli :
cliccate con il tasto sinistro o destro del mouse
oppure premete o .
premete insieme , per non ruotarne i figli sullo stesso asse.
sposta il marcatore verde a destra o a sinistra fra i frame disponibili.
sposta il marcatore blu a destra o a sinistra fra i frame disponibili.
sposta il marcatore rosso a destra o a sinistra fra i frame disponibili.
Ognuno di essi non potrà posizionarsi nel medesimo o sucessivo frame di un altro marcatore.
Cliccate con il tasto sinistro, destro o centrale del mouse
oppure premete , o
EXPORT
Qui potremo esportare gli sprites ed il codice della nostra animazione nel formato txt, da inglobare poi in un progetto creato con GameMakerStudio 1.4 o 2.0 .
ridimensiona :
cliccate con il tasto sinistro o destro del mouse;
Premendo anche le animazioni avanzeranno frame per frame.
Premendo andrete a selezionare direttamente questo bottone PLAY.
Codice Project.txt
Il codice del file Project.txt esportato, riporterà queste informazioni
Esso inizia con le origini x e y dei 18 sprites ( indipendentemente dal loro utilizzo ) :
1 >>>>>>>>>>>>>>>>>> INFO SPRITES <<<<<<<<<<<<<<<<<<
2 origini x dello sprites n° 18;
3 origini y dello sprites n° 18;
4 origini x dello sprites n° 17;
5 origini y dello sprites n° 17;
6 origini x dello sprites n° 16;
7 origini y dello sprites n° 16;
8 ecc...
Poi continua con le informazioni del totale delle Ossa :
38 >>>>>>>>>>>>>>>>>> INFO BONE <<<<<<<<<<<<<<<<<<
39 N° totale delle ossa;
Infine riporterà le informazioni di ogni singolo Osso :
40 >>>>>>>> start_depth_2 : 1; name : Braccio_DX; sprite : 2 <<<<<<<<
41 visibile true o false ( 1 o 0 );
42 numero dello sprite utilizzato;
43 sprite index o numero del frame ( può essere riportato anche -1 )
44 depth
45 posizione x
46 posizione y
47 scala x
48 scala y
49 angolo di rotazione;
50 colore in codice GML
51 trasparenza;
52 ecc..
Codice Animation_nome.txt
Il codice del file di animazione.txt esportato, riporterà queste informazioni :
1 Resize : ridimensionamento ( massimo 1 );
2 Numero totale dei frame di animazione;
Poi riporterà le informazioni di ogni singolo Frame per ogni Osso :
3 >>>>>>> Frame : 0; start_depth_2 : 1; name : Braccio_DX; sprite : 2 <<<<<<<<
4 numero dello sprite utilizzato;
5 sprite index o numero del frame ( può essere riportato anche -1 )
6 depth
7 posizione x
8 posizione y
9 scala x
10 scala y
11 angolo di rotazione;
12 colore in codice GML
13 trasparenza;
14 >>>>>>> Frame : 1; start_depth_2 : 1; name : Braccio_DX; sprite : 2 <<<<<<<<
15 ecc...
FOTO
In questa sezione potremo esportare la nostra animazione nel formato .PNG con sfondo trasparente, di ciò che si trova all' interno del "canvas"
( l'area evidenziata al centro che delimita la grandezza dello sprite che andremo a realizzare ) .
A sinistra troveremo i bottoni in arancione :
ridimensiona l'oggetto :
cliccate con il tasto sinistro o destro del mouse;
premi o
per selezionare l'osso del quale si desidera ruotare la Normal.
Viene utilizzata un immagine Normal standar riportata qui sotto e per questo motivo il risultato potrebbe non risultare soddisfacente :
PA3 in Game Maker Studio
Dopo aver esportato gli sprites ed i files.txt ( del vostro progetto e della sua animazione), potete importarli in un progetto per GameMakerStudio 1.4 o 2.0.
Attenzione : solo i progetti realizzati con PiccoloAnimatore v3 sono compatibili con il codice che segue qui sotto,
mentre i progetti realizzati con le precedenti versioni di PiccoloAnimatore, non funzioneranno.
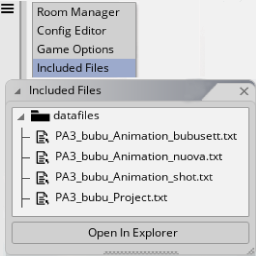
included Files
Negli "included Files" importiamo i 2 files.txt del codice :
PA3_nome-progetto_Project.txt ( il file di progetto )
PA3_nome-progetto_Animation_nome-animazione.txt ( file animazione).
in GameMakerStudio 1.4
in GameMakerStudio 2 [ v2022.2.0.614 ]
Sarà possibile avere più animazioni includendo i relativi file.txt delle animazioni.
Il loro nome è composto da :
PA3_ sta per compatibile con PiccoloAnimatore versione 3 .
"nome-progetto" nome del progetto al quale si riferisce;
_Project nel caso del file.txt principale del progetto;
oppure _Animation_ nel caso si tratti di un file di animazione
( in quest'ultimo caso alla fine vi sarà anche il relativo nome ).
Attenzione : a volte mi è capitato che gli included files importati su GMS, non fossero realmente salvati nella relativa cartella.
Per ciò, una volta importati controllate se sono presenti su :
GameMaker\Projects\Nome vostro progetto.gmx\datafiles\
Sprites
Importate tutti gli sprite del progetto e rinominateli con lo stesso suo nome, lasciando alla fine il numero che li identifica. Per esempio così :
in GameMakerStudio 1.4
in GameMakerStudio 2 [ v2023.8.2.151 ]
Uno sprites potrà avere più frames;
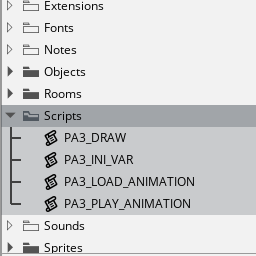
Script
Scripts per GMS2 aggiornati il 26/03/2024 ( ora con le variabili scritte in piccolo )
Scarica il file.zip ( tasto destro del mouse e salva ) con gli script GML adatti alla tua versione di GameMaker :
Estrai il files.zip ( Unzippa );
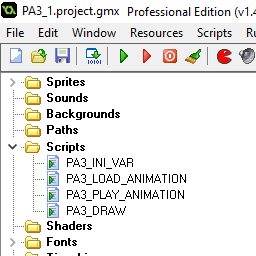
Importa gli script estratti, nella cartella degli Script del vostro progetto :
in GameMakerStudio 1.4
in GameMakerStudio 2 [ v2022.2.0.614 ]
PA3_INI_VAR :
script per inizializzare le variabili necessarie e per caricare i dati dal file.txt del vostro progetto;
PA3_LOAD_ANIMATION :
script per caricare i dati dal file.txt relativi alle animazioni del vostro progetto;
PA3_PLAY_ANIMATION :
script per ciclare un'animazione precedentemente caricata;
PA3_DRAW :
script per disegnare l'animazione;
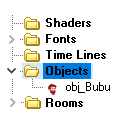
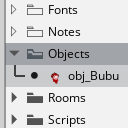
Object
Creiamo ora un object con lo stesso nome del progetto per esempio : obj_Bubu ;
in GameMakerStudio 1.4
in GameMakerStudio 2 [ v2022.2.0.614 ]
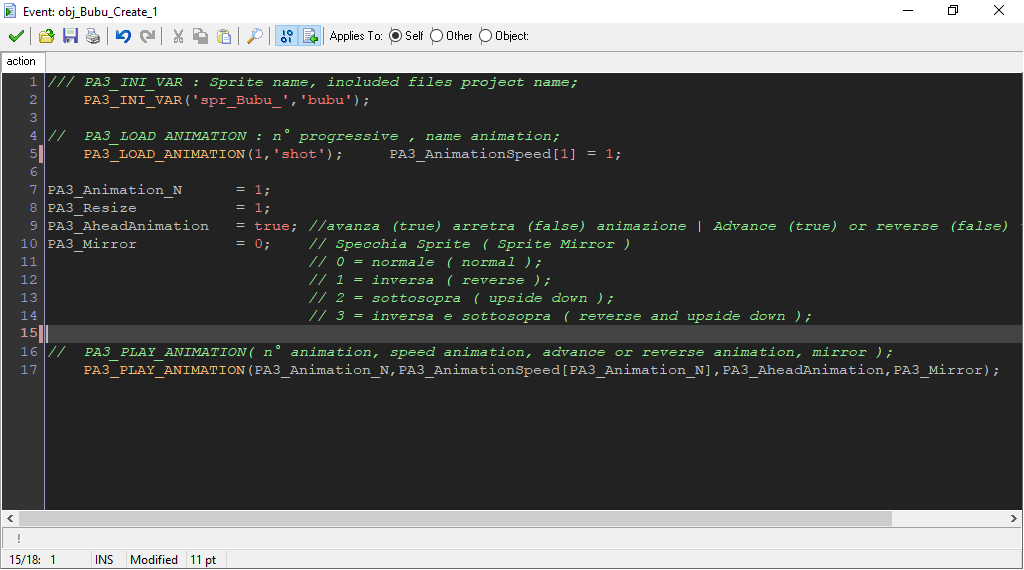
CREATE
Nel suo evento CREATE riportiamo :
PA3_INI_VAR ( nome sprite , nome proggetto ) ;
Questo script inizializza le variabili necessarie e carica i dati dal file PA3_nomeprogetto_Project.txt del vostro progetto;
nome sprite : stringa del nome dello sprite senza il numero finale ( in questo esempio : "spr_Bubu_" );
nome proggetto : stringa del nome del progetto nei file.txt ( in questo esempio : "bubu" );
PA3_LOAD_ANIMATION ( n , nome animazione ) ;
Questo script carica i dati dal file PA3_nomeprogetto_Animation_nomeanimation.txt relativi all' animazioni del vostro progetto;
n : il numero progressivo dell' animazione ( in questo esempio : "1" );
nome animazione : stringa del nome dell' animazione presente nel file.txt ( in questo esempio : "shot" );
PA3_Resize = valore;
valore : ridimensionamento ( massimo 1 );
PA3_PLAY_ANIMATION (
PA3_Animation_N ,
PA3_AnimationSpeed [ PA3_Animation_N ] ,
PA3_AheadAnimation ,
PA3_Mirror
) ;
Questo script cicla un'animazione già caricata
PA3_Animation_N = n;
n : numero dell' animazione selezionata;
PA3_AnimationSpeed [ n ] = speed ;
n : numero dell' animazione;
speed : velocità animazione ( max = 1; ).
Su Create per la prima animazione richiamata, impostate sempre 1
affiché PA3_Resize sia subito impostato tramite PA3_PLAY_ANIMATION();
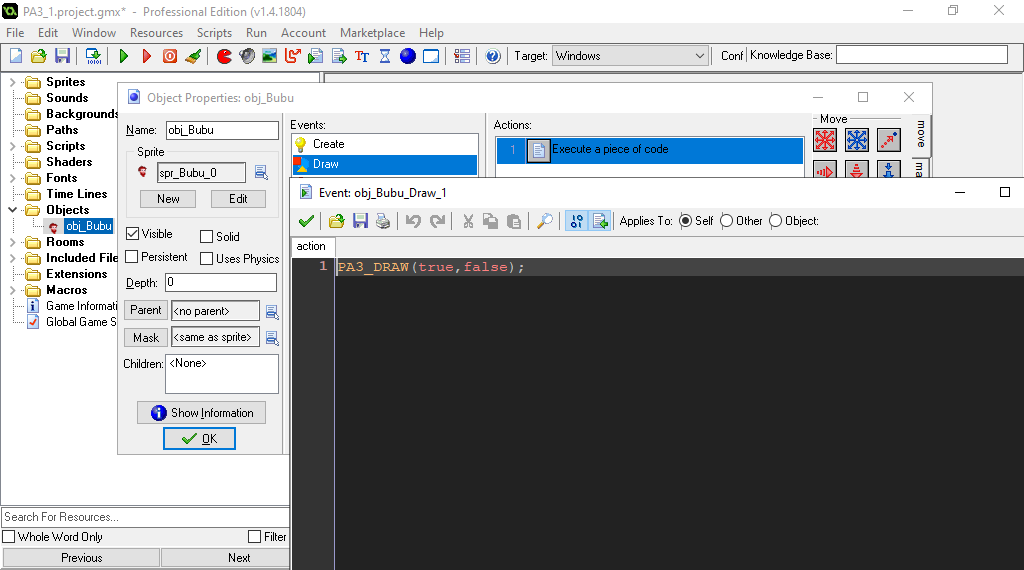
PA3_DRAW ( 1 , 2 ) ;
Questo script disegnerà il vostro progetto.
true o false : cicla o meno l'animazione;
true o false : visualizza un animazione avente la depth modificata
( Ciò comporterà un maggiore utilizzo di calcolo ).
FAQ & Problemi ???
Attenzione le nuove variabili presenti negli script dedicati a GMS2, sono scritte in piccolo.
Nel caso si abbia impostato l'index della textura a -1, ma non si riscontra l'avanzare dei frame dello sprite, impostate image_speed ad un valore maggiore di 0. In oltre l'object dovrebbe avere uno sprite avente più frame.
Nel caso parti del disegno non vengono visualizzate, controllate nella sua animazione che ogni Osso abbia impostata la propria depth
diversa l'uno dall' altra e con un valore da 1 al numero totale di ossa presenti.
Il Resize degli sprite viene reimpostato solo richiamando lo script PA3_PLAY_ANIMATION(....) ;
Attenzione : a volte mi è capitato che gli included files importati su GMS, non fossero realmente salvati nella relativa cartella.
Per ciò, una volta importati controllate se sono presenti su : GameMaker\Projects\Nome vostro progetto.gmx\datafiles\
Per segnalazioni di bug o altro contattatemi su Twitter @gamequiz_tk
Aggiornamenti PiccoloAnimatore v3
Per ora il codice è stato testato positivamente con GamemmakerStudio 1.4xx su Windows10 ed HTML5, e con GamemmakerStudio 2 su Windows10 ed OperaGX;
Mentre non è mai stato testato su Android ed altro.
24/03/2024 aggiornato PiccoloAnimatore_v3 ( modifiche compatibili con la precedente versione )
aggiunto su IMG il bottone [Sprite_Transp] per caricare files.png con le giuste trasparenze, oppure opaco ( seppur con la trasparenza del suo Background );
aggiunto su FOTO il bottone [1 foto All ] per visualizzare ( quindi poi esportare png ) con una o tutte le ossa.
nuovo script per GMS2 [ v2023.11.1.129 ] : solo modificati i nomi delle le variabili in piccolo.
24/11/2023 aggiornati gli script PA3_scripts_GMS_11_2023.zip e PA3_scripts_GMS2_11_2023.zip Per compatibilità con GMS2 alla versione 2023.8.2.151 :
Capitava un errore nello script gml_Script_PA3_INI_VAR ( line 29 oppure 37 )
Risolto modificando il codice da così :
sprite_set_offset( PA3_LOAD_Sprite[i],PA3_origini_x[i],PA3_origini_y[i]); a così :
if sprite_exists(PA3_LOAD_Sprite[i] ){
sprite_set_offset( PA3_LOAD_Sprite[i],PA3_origini_x[i],PA3_origini_y[i]);
}
Aggiunto bottone per fullscreen;
Aggiunto bottone IMPORT;
Aggiunti Bottoni PHY ...;
Aggiunto bottone MIX SEQ;
Aggiunto bottone BACK;
Aggiunto Menu bottoni selezione Osso;
Aggiunto skeleton favoriti;
Aggiunto dialogo di caricamento sprites;
Aggiunti dialoghi per la modifica dei color;
Aggiunti più effetti shader;
Non si utilizzano più le Macros;
Migliorate le funzioni LERP;
Duplica un progetto;
Si può copiare, duplicare, invertire i frame e bone;
Gli sprites possono avere più frame selezionabili nell' animazione;
Si potrà modificare la depth nell' animazione;
Esportazione immagini con sfondo trasparente;
Esportazione dell' intera animazione in uno strip.png;
Utilizzo del tasto TAB per selezionare i bottoni;
si visualizzano i tasti relativi al bottone selezionato;
Aggiornamenti PiccoloAnimatore v1
and PA1_GMS_v...
Codice testato positivamente con GamemmakerStudio 1.4xx su Windows10 ed HTML5, non testato su Android od altro.
Ora il personaggio viene raffigurato utilizzando un singolo object , permettendo così di inserire più instance nella room [ PA1_GMS_v5 ];
Ridotto e migliorato il codice ( non più utilizzato l'alarm[0] , non serve più PA_ADD , lo script PA_PLAY_ANIMATION();
non contiene più il nome dell' animazione, altro... ) [ PA1_GMS_v5 ];
Sono stati aggiornati gli script e gli object [ PA1_GMS_v3 , PA1_GMS_v4 , PA1_GMS_v5 ];
Ora è possibile specchiare l'animazione sia verticalmente che orrizontalmente [ PA1_GMS_v4 ];
Velocizzato il caricamento [ PA1_GMS_v3 ];
Si possono inserire più object che utilizzano i medesimi sprite e cartella degli included files [ PA1_GMS_v3 ];
Un object può avere più sprite differenti [ PA1_GMS_v3 ];
Gli sprite non saranno più caricati fra gli inluded files ma come normali sprite e le origini saranno aggiornate [ PA1_GMS_v3 ];
Nella room non è ancora possibile aggiungere più instance del medesimo object, ma spero di riuscirci in un eventuale nuova versione [ PA1_GMS_v5 ]
Il personaggio MiniHero è creato utilizzando il designe by freepik ma modificato ed animato da civic71 :
Kids vector created by Freepik
Il programma è fornito, senza qualsiasi garanzia espressa o implicita.
In nessun caso voglia l´ autore essere giudicato responsabile per tutti i danni in seguito all´ uso di questo software.
Il programma è gratuito, non è richiesta alcuna tassa o costo e non è autorizzata la sua vendita.
ALL PROJECTS
AFFILIATI :
PiccoloAnimatore 3 Projects :
Download the free projects and import them to PiccoloAnimatore 3
Scarica i progetti gratuiti ed importali su PiccoloAnimatore 3


 HTML5
HTML5 


 APK
APK 
 GAMES
GAMES 


 Program


 Inglese o
 Italiano) :


 ( rettangoli presenti nella barra in basso ) cliccandoci sopra


 ,
quella funzione sarà interpolata partendo dal frame avente il triangolo verde fino al frame che ha il triangolo rosso.
,
quella funzione sarà interpolata partendo dal frame avente il triangolo verde fino al frame che ha il triangolo rosso.
 l'interpolazione avverrà partendo dal frame avente il triangolo verde, fino al frame avente il rombo blu.
Poi continuerà dal frame avente il marcatore rombo blu al frame avente il marcatore con il triangolo rosso.
l'interpolazione avverrà partendo dal frame avente il triangolo verde, fino al frame avente il rombo blu.
Poi continuerà dal frame avente il marcatore rombo blu al frame avente il marcatore con il triangolo rosso.


 Download the free projects and import them to PiccoloAnimatore 3
 GMIForum